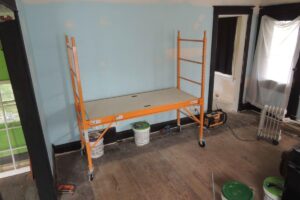
We basically replumbed the entire apartment because of all the changes we “had” to make. I say “had” because after looking over our blown budget I’m stuck wondering “was it all really necessary?” Check out the before pictures of the apartment here and judge for yourself when it’s all done!
I’ve said to myself many times “couldn’t we have just stuck with the original plan of a simple apartment turn over?” You know, slap some paint on the walls, clean up the bathroom and kitchen and buy some blinds for the windows? Wham bam thank you ma’am… no we can’t. For some inexplicable reason, we always have to go above and beyond on everything we do, and this apartment renovation is no different. All I can hope is that these “extras” will get us a good tenant for a good rent. Wouldn’t you want to rent a beautiful apartment with fresh paint, a washer dryer, brand new appliances, new kitchen counters and cabinets, all new flooring and a freshly renovated bathroom. Oh and did I mention the counters will be concrete? How trendy is that?
I don’t have the answer for you on whether or not all this extra work (and extra money) will pay off but I do have an update on the progress of the apartment.
If you’re keeping track, this is the first update on the progress of the apartment even though we bought the property back in July. I actually don’t know where the past 5 months went. I always promise to make time for myself and write but it never happens. So if a genie just so happen to come out of a bottle for me, I’d use all three of my wishes for more time, it’s the only thing you can’t manufacture or make happen with hard work.
But I digress, I’m supposed to be telling you what we’ve been up to with the apartment over the past 5 months.
Apartment Renovation Update
The list isn’t that long because remember, we’re only working on the place nights and weekends.
Drop Ceiling
The first thing we did was replace the drop ceiling with drywall and also replaced ALL OF THE CEILING insulation because I was afraid it was moldy. My reasoning for this? The roof was never replaced on the garage and some of the plywood looked like it could have been leaking at one point and because it was built sometime around 1976 (which made the roof at least 40 years old) I made the decision to be “better safe than sorry.” Well $500 in insulation later I was sorry, we realized it was not, in fact, moldy, it’s just the color of the backing on the insulation. I’m still feeling a little salty on that one so I’ll leave it at that.
Cabinetry
The cabinets were delivered (which was a nightmare in itself) and are currently sitting in the garage awaiting assembly and install. But install can’t happen until the flooring goes down. But flooring can’t go down because we ordered it too late in the process so now the delivery is what’s holding us up (you’d think we would have learned this lesson already from our first flip.)
But back to those cabinets… We bought RTA cabinets, aka ready to assemble, which means we have to put them together before we can install them. But listen people, the reason I bought them is because you save so much money just because you have to put them together! The actual quality of the cabinets is much better than something you’d buy from a big box store. The drawer boxes are 3/4″ plywood, the cabinet boxes are 1/2″ plywood and the face frames are solid wood and I paid the same price that I would have paid for particle board or MDF cabinets from home depot! I’ll definitely be writing a blog post on these RTA cabinets after assembly and install, so more details to come on this topic to come!

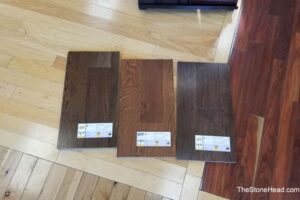
A 1/4 door sample of the kitchen cabinetry
Paint
But I’m proud to say that the entire apartment has two coats of paint on the ceiling, walls and trim and about 27 coats of spray paint on the baseboard heaters. Don’t get me started on the baseboard heaters – but long story short, I wasn’t about to spend $1000 in new baseboard heaters just because the ones on the walls didn’t look pretty. So you know what I did? I made them look pretty.

I used a high heat spray paint after sanding and cleaning the baseboards and blocking off the parts I didn’t want to get hit with spray paint which was why I spent an entire Monday morning taping paint sticks together.

Paint sticks taped together… a Monday typical morning.
I’ll be the first to admit that the baseboards were in rough shape to start… but I wound up using 5 cans of spray paint for 40 feet of baseboard heater! To put this into perspective, the bathroom heater which is the smallest baseboard heater at about 2′ took an entire can of spray paint to even begin to “look pretty.”

Bathroom Wall
Speaking of the bathroom, we also moved the bathroom wall 15 inches to accommodate the washer/dryer unit and a stand up shower we replaced the bathtub with. My thoughts on this decision were this: Personally, I’d give up a bathtub to have a washer and dryer in my apartment, so I’d say that decision was a win. Right? We’ll also collect a little more in rent every month and so long as the washer/dryer doesn’t break down, we’ll recoup our money on this investment within a year. And besides, we had to change that wall from a 2×3 to a 2×4 wall anyway so the plumbing would fit… so there was no actual added cost to move the wall since we were going to have to re-frame it out anyway. Get me?

Baseboards
But in order to start recouping our money we have to get the apartment rented out. So while we wait on the flooring to be delivered, I’ve found odds and ends to do while we wait… In the past week I’ve taken out the baseboards, sanded them and painted them with three coats of trim paint. And thank God for the propane heater the boyfriend put in the garage because it’s getting cold here in Pennsylvania and the block garage is even cold in the winter so you can imagine how cold it gets when it’s in the thirties.

Windows and Doors
I’ve cleaned the windows and sliding door glass and tracks with a toothpick and a toothbrush. As you an see in the picture below, smoking must have been allowed in the apartment at one point because the frames were covered in nicotine making them look yellow when they’re supposed to be white!

Goof Off
Lastly, I spent some time cleaning and scraping dried paint off the shelves and clothing rack in the bedroom closet (cleaning tip: Goof off works wonders for dried on latex paint!)

This project has also taken a while because we had to take some time to re-do the roof, while we weren’t originally planning to do it this year, it needed it, bad. I have never seen shingles so worn out! Read more about that fun adventure here.
So there you have it. An update on what’s going on with the renovations in the apartment. Basically, we’re in the “putting it all back together” stage, which is by far my favorite stage. Who doesn’t love picking out finishes?!
Oh I almost forgot… here’s a tip for you DIYers, flippers and renovators, never leave the front door wide open, random animals are likely to enter. (By the way, her name is Lola and I might be in love.)

That’s not my dog.
Let’s hope the next post is titled “apartment update: it’s rented.”


