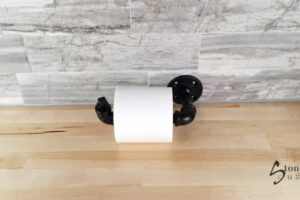
Of course I had all these bathroom storage ideas floating around my head but it wasn’t until I saw this leftover cabinet from when we remodeled the apartment above our garage (I’ll link to the before and after pictures of that at the end) that I got the brilliant idea to create one of the most unique bathroom storage solutions I’ve personally ever thought of.
And as usual, before we go any further I must announce per the FTC that you can assume any links in the post are probably affiliate links. This means I make a small commission if you click and purchase through those links with no increase in cost to you. I work hard to provide sources to my projects where possible and they are there for your convenience… I personally love blogs that just list out the crap I need for the project. #amiright If so inclined, read more here.
One of the Best Bathroom Storage Ideas EVER | The Steps
1. Holes for the Rustic Bathroom Shelving
First, we cut our shelf to the right size. What’s the right size? You can really do whatever size shelf you want. We cut a leftover piece of butcher block from our kitchen remodel to just under the size of the cabinet. In our case we had a 30″ cabinet so we cut the butcher block to 29-7/8″.
As far as the width of the shelf, we went with 11″ only because it was the size of the leftover piece already! But if you have 12″ deep cabinets, feel free to go up to 12″!

With the shelf laying on top of the cabinet we marked the center of the width of the butcher block with a punch. I highly recommend using a punch [this one specifically] so when you drill your pilot hole the drill bit tip doesn’t go slipping across your beautiful shelf. Oh! and make sure you leave enough room for the flange. Our flange was 3-1/2″ so we had to stay 1-3/4″ away from the ends of the shelf.

After we were done with all the marking, we used a 7/32″ drill bit tip and very slowly drilled through the wood and through the cabinet. If you’re going through a really hardwood, make sure to take the drill bit out of the hole every once in a while and let it cool.
 Then we took our 7/8″ hole saw bit and drilled through our cabinet. You’ll see in the picture below we drilled through the bottom of the cabinet – this is not ideal and if you can get your drill inside the cabinet and go down you’re less likely to “blow out” the inside of the cabinet.

Then we drilled through our butcher block shelf and just when the tip of the hole saw poked through the other side, we flipped it over and finished from the back – just to ensure we didn’t blow out the wood on the shelf like we did with the cabinet.
 2. Drilling Holes for This Rustic Bathroom Shelving/ Securing Your Bathroom Storage Ideas
I highly, highly, highly recommend going into two studs with bathroom storage solutions that weight a lot like this one. We weren’t able to catch two studs so we wound up catching one stud and adding four anchors for a total of 6 screws.
First you’ll want to find studs. A stud-finder [like this one] really helps. It lights up when it detects wood behind drywall. Sometimes however, stud finders won’t work properly on plaster walls (likes ours!) So you may have to double check your results by tapping a thin nail into the wall to check if you’ll hit a stud. This is where we definitely needed two people. First, we marked the center of the cabinet. Then we marked the center of the toilet and held up the cabinet until the two marks lined up and we made sure it was at the height we wanted. Then we transposed the stud mark onto the cabinet.
Then we took the cabinet down and transposed that mark on the outside of the cabinet onto the inside of the cabinet. (Have I lost you yet?) Then used a 3/16″ drill bit to drill through from the inside of the cabinet to the outside of the cabinet (again, to prevent wood splitting and to allow the screw to pass semi-freely through the cabinet so it can bite into the stud. AND THEN we held the cabinet up again! We waxed our drywall screws, lined up the cabinet center with our center mark above the toilet, doubled checked we were going to hit a stud and drilled a 3″ coarse thread drywall screw through the cabinet and into the wall and stud along with a #8 finishing washer to make it look extra finished (although you’ll have to take it down again so you could add the washers the second time, but I know I’d forget so I add them in this step.)
 Next, using a 3/16″ drill bit, we drilled four more pilot holes through the four corners of the cabinet leaving us with four little holes on the wall after we took the cabinet back down again.
 Then we used a 1/4″ drill bit to drill out the drywall for the anchors (because that’s what our box of anchors said to use, double check your anchor size.) Then we tried to tap in the anchors but they wouldn’t fit! So we used the 1/4″ drill bit to ream out the hole just a bit (this can happen when you’re going into plaster but not so much with drywall because it’s more… squishy… if you will, and will “move” for the anchor more so than plaster.) Then we were able to get all four anchors in!
3. Whew. Install the Bathroom Storage
Next we hung the cabinet back up for the final time and secured it to the stud and to the four anchors using 6 (six) 3″ waxed drywall screws and finishing washers.
 Next is the easy and fun part! We took our pre-painted 18″ pipes and caps and secured them through the cabinet so we could attach and hang the shelf! We made sure to screw the cap on as tight as we possibly could because it’s what’s holding most of the shelf weight!
 Then Todd held the shelf while I guided the 18″ pipe nipples through the hole and tightened the flange onto the end of the pipe nipple. For added measure we also used #6 x 1-1/4″ drywall screws to secure the flange onto the underneath of the pipe shelf.
 We originally were going to do four pipes hanging from each corner of the cabinet but decided against it because the shelf seemed too small to have four pipes and flanges on it, we thought it might look crowded. Although I love the clean look of just the two pipes hanging down I will admit that the shelf does have a little “play.”
 This doesn’t bother me whatsoever as we used some furniture felt and put them on the back of the cabinet so it wouldn’t damage the wall from any tapping. But ever since we but them on, the shelf doesn’t move anymore! So I’m beyond happy with the two pipe method and would only go with four pipes with a wider shelf (remember, ours was only 11″ wide.)
 I love that this bathroom storage solution 100% matches our bathroom vanity and butcher block countertop! Luckily we used the same cabinetry throughout the apartment remodel and the main house remodel and that we had leftover butcher block! Actually, I should say luckily. It was well thought out 🙂
The Supplies | How to Build Rustic Bathroom Shelving
Now for a list of supplies we used to build our bathroom storage idea!
- Two (x2) 18″ x 1/2″ Pipe Nipples [found here]
- Two (x2) 1/2″ Floor flanges [found here]
- Two (x2) 1/2″ Caps [found here]
- Six (x6) 3″ Drywall screws [found here]
- Six (x6) Finishing washers [found here]
- Eight (x8) #6 1-1/4″ drywall screws [found here]
- Cabinet of your choosing. [I get mine here]
- Shelf of your choosing. (We used scrap butcher block countertop!)
And as usual for your convenience, you can find most of this stuff already in an Amazon list I created here!
The Tools | How to Build Rustic Bathroom Shelving
- Wood punch [found here]
- 7/8″ hole saw [found here]
- I recommend the entire Dewalt bi-metal hole saw kit [found here] because it’s just awesome and you never know when you’ll need a different sized hole saw bit! I bought both myself and Mr. Stone Head each a kit last year!
- 7/32″ drill bit tip [found here]
- 1/4″ drill bit tip [found here]
- 3/16″ drill bit tip [found here]
- Orrrrrrrr buy this cute little drill bit kit [found here]
- Stud finder [found here]

(My two guys… putting together rustic bathroom shelving.)
And that’s how one of my crazy bathroom storage ideas came to life! Thanks for reading and be sure to comment below! What do you think about the two pipe versus four pipe method? Is this something you might considering creating!?!
I didn’t forget! Here are the links I promised throughout this post!
Link to our 1 bedroom 1 bathroom apartment renovation before & after photos.
Link to the kitchen remodel before & after pictures
Subscribe!
Be sure to reach out on Instagram; Facebook; or Pinterest; and subscribe to this blog to be notified when new blog posts are up – who would want to miss those!?! (And if you’re a fellow blogger submit your website! I love finding new blogs to read, pin and share!!! It’s so hard to find a good quality blog nowadays, you know what I’m saying?)
[contact-form-7 id=”3255″ title=”Contact form 1″]


